As small business owners, we all have to deal with images. We use them to blog our thoughts or share on social media platforms. We also have images associated with our business, like company logos and blog post images. Here are small business image tips to help you stay organized.
Estimated reading time: 7 minutes
Topics
Key Takeaways
- Store your small business images in organized folders on your computer or cloud for easy access.
- Create a brand identity policy for using your company logos and other images effectively.
- Use descriptive filenames and categorize your images to simplify searching and retrieval.
- Opt for high-resolution images and resize them for optimal website performance.
- Ensure you credit sources when sharing others’ images to maintain professionalism.
Where should you store your company’s logo images?
- Keep the logo images in a separate folder on your computer or the cloud. Storing the most-used images in the cloud is handy, but always have a copy on your computer just in case you cannot access the cloud due to internet issues.
- Keep the Hex Color Code and/or RGB color code for your logo. Using an online application like Evernote or Microsoft OneNote, create a page that holds these critical information details in it. This will make it easier to create customized background colors that match your brand.
- Create different sizes of your logo. If your logo is more horizontal, make a vertical image and a square image. Some online platforms require a particular orientation, so having your logo in various orientations will help you find the right image quickly.
- Customize the filename of each image. Start with the same filename at the beginning, then add abbreviations like “BW” for black and white, “Transp” for transparent, and the image size (e.g., 1200 x 1200 px). Be sure to save your logo in different formats like .png and .jpg.
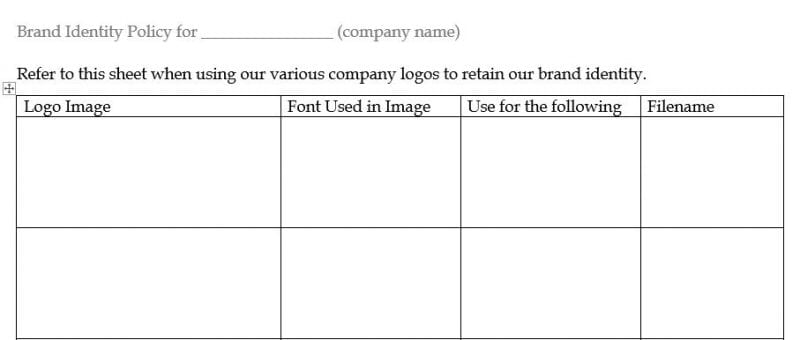
- Create a brand identity policy for use with the different images. This should be a printable or digital sheet you can give your assistant to use when creating image layouts for you. Include an image, then indicate what the image is used for. For example: when you create a quote, use this particular image. When you create an ad on Facebook or other platforms, use these logo images. For job listings, use another logo image. When you have to update a website, use another image. Below is an example of how your brand identity sheet should look.

How to organize your small business social media images?
While using stock images like Pixabay is helpful, sometimes you want a specific picture to convey a particular scene that may not be found on a stock photo site. This section covers where to take these photos and how to organize them.
What type of camera should I use?
Well, you really don’t need a camera. If you have an iPhone or Android phone, you probably have a good option for taking pictures. Playing around with your phone’s camera settings before taking photos for your business can help. The image resolution is good enough for the web. I found a few posts that may help.
How to Take Professional Photos with your phone
4 secrets: How to take professional photos with your smartphone
Check out my post about my experience of organizing the professional photos for my business:

How to Plan a Small Business Personal Brand Photoshoot
As small business owners, we must be courageous in front of our potential clients, whether on social media, podcasts, or other media. We must present ourselves professionally and know how our business brand comes across to others. I recently revisited my business personal brand and wanted to do something I haven’t done in my 23+
Where to take pictures to use on social media for image backgrounds?
- Local parks or botanical gardens
- Local zoos
- Your backyard
- In your home
- A friends backyard with their permission
After you upload the image from your phone or camera, follow these step-by-step instructions to organize your images on your computer. This will help you when searching for images.
- Save as a JPG in the largest possible format. If you make the image smaller, you may have resolution (blurry) problems down the road when you want to use them.
- Always rename your images to describe the image; don’t leave them as img_2599.jpg. Look at the image and decide what is the main topic in the image.
- Then, what is the next main topic? Two main categories for each image will help you remember the image name better. I like to use full names with ” – ” dashes between the words. This makes it easier to search. An example of a file name could be: Roses_garden.jpg
- Make a list of all the topics (categories) you use on your images. Using a spreadsheet format will let you sort easily by category name for better reference.
Note: I like to put all the random misc. images in one folder. It seems to work better when searching. However, a good filename makes it easier to find images you are looking for in a cluster so you can compare them with one another.
How to organize your website images?
- Website images are the ones you upload for your website blog posts and pages. These images are important as they are a backup for any live posts that you used on your blog.
- Keeping these images in a separate folder called “website images” works nicely. It saves you time while looking at all the other images you have stored on your computer or server.
- When renaming images for your blog, be sure to resize them to a smaller format. This will help with the speed on your site. Keep in mind the larger the image the slower the website.
- Using the same file name for each image works best. I like to add a number 1, 2, 3 or 4 to the end of the file name. Personally, I use the name of the blog post so it corresponds back to the website. Use ” – ” dashes between the words as a replacement for spaces also.
By taking the time to do this task while you are setting up your website pages or posts, you will be grateful if you ever have to refer to or upload a replacement image in the future.
How to be professional when sharing others’ images?
I can’t end this post without saying something about sharing others’ images on your blog or social media accounts. I’ve had several of my images cut and reposted on other blogs, which is a no-no, especially for businesses. As a business owner, spend the time and find images that are allowed to be used for commercial businesses. Sites like Pixabay state “Free for commercial use. No attribution required” right next to the image.
You must always give your source when sharing an image from others. The best way to handle this is to link back to the source’s website. I also like to add the name of the owner in the image title section so it appears under the image.
NEVER copy and paste a photo from someone else’s site without giving acknowledgment. Remember, when you are sharing on social media or your website, these are your company’s property. And rules are different for companies than for individuals. So, always err on the side of caution and share the link to where you got this information.
I hope this helps you organize your small business images. What is your main issue with images for your small business? Please leave a comment below. I may create a post about your particular issue. Thanks for stopping by.
Related Posts: